Materials & Prerequisites
Materials required
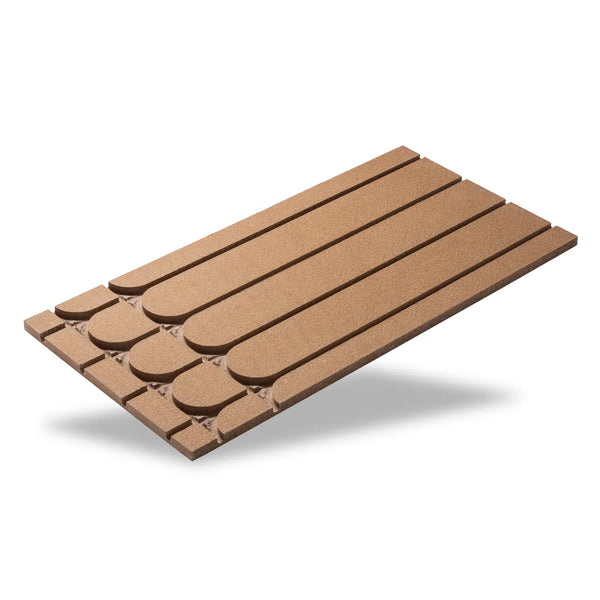
- →EPS 300 System Panel (Meander) 25 mm — €14.92/m² (10-m²-pack: €10.74)
- →Wood fiber system board (meander) 25 mm — €22.64/m² (10-m² package: €16.30)
- →Heat spreader plate Ω-profile for 16mm pipe — €1.77/pc. (50-pc. pack: €88.35)
- →PE-RT-ALU-PERT Multilayer Pipe 16×2 mm — €0.70/m (200m coil: €140.00)
- →Edge insulation strips — €2.53/m (20-m roll: €50.65)
- →Fermacell 2E22 Dry Screed Element 2×12.5 mm (purchase separately, approx. €13/m²)
- →Pressure gauge for leak testing (test pressure at least 6 bar)
Requirements before Laying
- →Substrate level according to DIN 18202: max. 3 mm/0.1 m, 10 mm/1 m, 20 mm/4 m
- →Concrete substrate: Residual moisture CM ≤ 2%, compressive strength min. 20 N/mm²
- →Wooden beams: Wood moisture content ≤ 15%, all planks securely screwed, no loose joints
- →Heating circuit manifold installed, pipe lengths planned (max. 90–100 m per heating circuit)
- →Thermal insulation according to GEG/DIN EN 1264-4 already installed (EPS DEO ≥ 100 kPa)
How the drywall system works
Install a Drywall System: 10 Steps
Step 1: Check and prepare the substrate: Measure the flatness with a 2-m straightedge. Tolerance values according to DIN 18202: maximum 3 mm per 0.1 m, 10 mm per 1 m, and 20 mm per 4 m. Level out unevenness: grind down high spots, fill depressions with leveling compound. Concrete subfloor: measure residual moisture with a CM device (CM ≤ 2%). Wooden joist ceiling: secure all floorboards with screws, close gaps with filler. Completely remove dust and loose particles.
Step 2: Attach perimeter insulation strips: Apply self-adhesive edge insulation strips around all walls, door frames and columns. Minimum width 5 mm, height must reach the top edge of the finished floor. Cut and overlap in corners - no gaps. For room lengths exceeding 8 m or areas over 40 m², additional expansion joints are required. The strip absorbs the thermal expansion of the dry screed and prevents sound bridges.
Step 3: Laying the thermal insulation layer: Lay EPS insulation boards (DEO, compressive strength ≥ 100 kPa) with linear joint offset. Minimum R-values according to DIN EN 1264-4: 0.75 m²K/W for heated rooms below, 1.25 m²K/W for cellars or ground. Stagger layers by 50% for multi-layer insulation. Secure joints with adhesive tape. No cavities under the boards — if necessary, use infill material to level unevenness in wooden beams.
Step 4: PE film as moisture barrier: Lay out PE film (at least 0.2 mm thick) over the entire surface. Overlap individual sheets by at least 20 cm and seal airtight with adhesive tape. Pull the film up the walls by at least 10 cm and clamp it behind the edge insulation strip. On the ground floor or above ground, the moisture barrier must be installed in accordance with DIN 18533 — provide bituminous sealing here if necessary.
Step 5: Bonding EPS or wood fiber system panels: Apply flexible adhesive over the entire surface of the substrate with an 8 mm notched trowel. Lay EPS 300 system panels in a staggered bond — joint offset min. 200 mm. Wood fiber system panels: use water-resistant flexible adhesive, observe panel weight of 7 kg/m². Miter corner connections. Do not load panels until the adhesive has cured (approx. 24 h). Meander channels must be perfectly aligned.
Step 6: Insert heat distribution plates: Press the heat conductive plates (omega profile) into the pre-milled channels of the system panel - approx. 4.5 plates per m² with 150 mm pipe spacing. Maximum spacing between plates: 5 mm. In deflection areas, lay short plates so that the pipe channel is completely covered. Important: the inserted heating pipe must not protrude more than 1 mm above the panel surface - otherwise, a uniform bearing surface for the dry screed cannot be guaranteed.
Step 7: Laying the Heating Pipe: Insert the PE-RT-ALU-PERT composite pipe 16x2 mm from the dispenser (not coiled) into the channels - never kink it. Minimum bending radius: 5x outer pipe diameter = 80 mm. Adhere to a maximum pipe length of 90-100 m per heating circuit. Lay the turns in spacers, not on panel joints. Connect and label the pipe at the manifold (room + length). Photographically document the installation plan - mandatory before screed laying.
Step 8: Perform a leak test: Fill all heating circuits with water and bleed them completely. Pressurize the system to at least 1.3 times the operating pressure, but at least 6 bar. Maintain and log the pressure for 24 hours. In case of pressure drop: locate the leak with soapy water, replace the pipe. The leak test report is mandatory before laying the dry screed — without a report, the warranty will be void.
Step 9: Laying the PE separating film and dry screed: Lay PE separating film (0.1 mm) over the system plates and pipes — this prevents moisture ingress from the screed element. Lay Fermacell 2E22 dry screed elements (2×12.5 mm) across the entire surface: joints must be offset by at least 200 mm, glue joints. Insert 10 screws per m². Critical: Mark the raw pipe position on the element with chalk or marking paint before screwing — never screw through the heating pipe layer!
Step 10: Initial commissioning according to DIN EN 1264: Initial commissioning earliest 21 days after adhesive curing. Starting flow temperature 25 °C. Increase by a maximum of 5 °C each day until the design temperature is reached. Maximum permissible flow temperature: 55 °C. A heating protocol according to DIN EN 1264-4 must be kept and stored – mandatory for warranty claims. Heat pump operation: Flow 30–45 °C, COP-optimized.
NEVER screw through heating pipes
When screwing down the dry screed element (Fermacell 2E22), the greatest danger is: screws that penetrate the heating pipe will lead to immediate water leakage and are no longer repairable under the screed. Mark the pipe's position with chalk or marking paint on the screed element before inserting even a single screw.
Leak test before screed covering mandatory
Laying dry screed over untested heating pipes is a workmanship error. A leak under the dry screed cannot be repaired without completely removing the top layer. Carry out the leak test with 6 bar test pressure over 24 hours and document the result in writing.
Frequently asked questions about drywall system installation
Drywall System Components for Your Installation
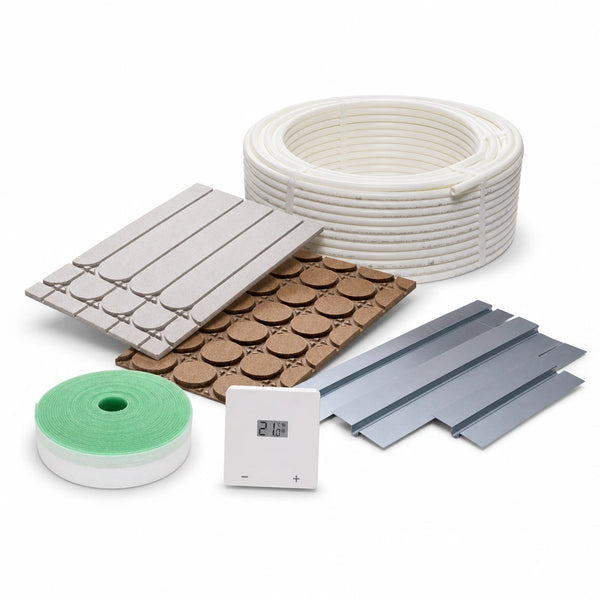
Drywall Underfloor Heating Complete Set | Drywall System Configurator

ArdusAlu Komplettset Trockenbau-Fußbodenheizung – EPS 300 mit Alu-Wärmeleitschicht statt Wärmeleitblechen

Drywall Underfloor Heating Complete Set EPS300